Hello again, Tuesday Enthusiasts! Mind if we call you that?
Ever since we kicked off our personalization series, we’ve sort of become Tuesday fans ourselves. Okay, we get it – Fridays have their charm with their weekend vibes. But there's just something about Tuesday that's extra special for us, and we're hoping it's carving out a cozy spot in your week too.
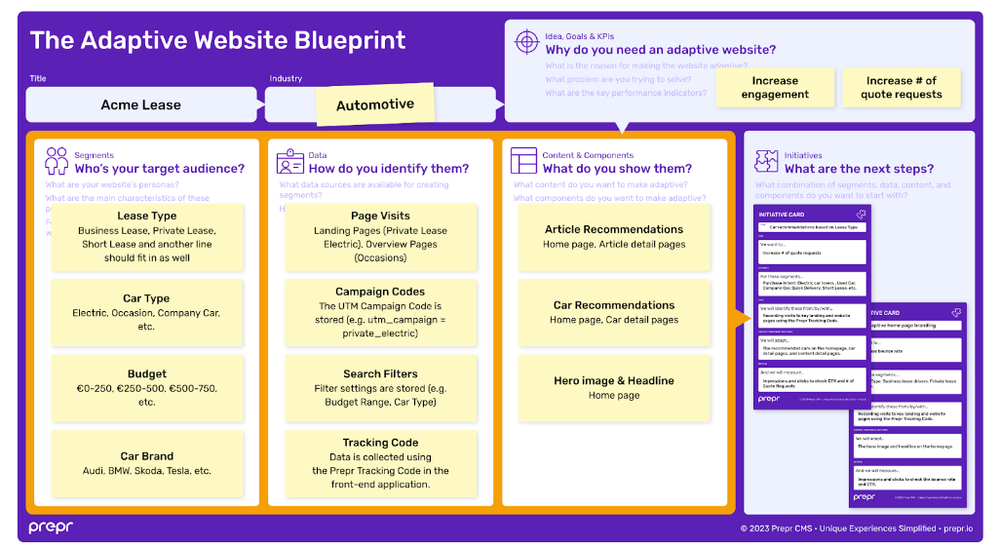
That said, we're back with another dose of our personalization blog series. In the last article, we discussed the Contents & Components section of Adaptive Website Blueprint. It focused on what components to adapt, the content to show your audience, and where to place them on your pages. Today, believe it or not, we'll cover the last section of our Blueprint. This part is all about turning those blueprint ideas into manageable tasks that can fit into one sprint. Feeling the excitement? We sure are! Let's get started!
The initiative cards
Do you enjoy game nights? Here at Prepr, we're big fans of board games, whether they're complex or simple. I bet you've all tried games with cards – the excitement of not knowing what cards you'll get in the next round, hoping those winning cards are in your hand… and that's what makes the game so much fun.
But when it comes to building our adaptive website, we can’t rely on fate or just hope for the right cards like in a game of chance. We need to be proactive and create our own winning cards. And that's exactly what we're going to do in the final part of our Blueprint. Together with your team, you’ll create initiative cards that will serve as your winning strategy for achieving your goal: the development of your adaptive website.
In the previous sections, we got lots of ideas about what can we do to make our website adaptive. However, tackling all these ideas simultaneously can be overwhelming. We need to start small, share the concepts with the team, and see quick results. This is where initiative cards come in handy – they help condense our myriad ideas into smaller, actionable batches of work.
Initiatives serve as the building blocks of your personalization efforts, allowing you to break down your work into manageable chunks and helping you handle things step by step.
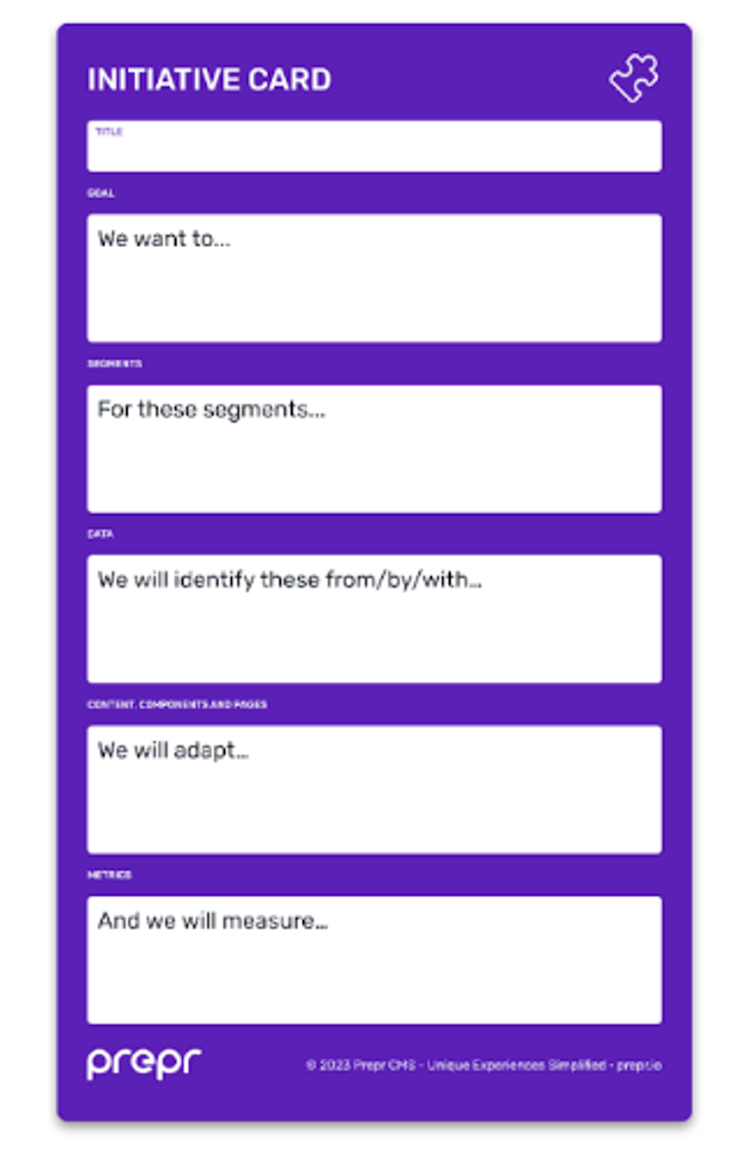
To create your initiative cards, you can use the template provided. Let’s see what the items on the card are.
Goal: Think of this section as your destination. Pick one of your ideas from the Idea, Goals, and KPIs part of the Blueprint and define what you want to achieve.
Segments: In this block, incorporate the segments you defined earlier that align with this specific initiative.
Data: Choose the relevant data points and sources for the identified segments.
Content & Components: Choose content and components from your blueprint that will get you closer to your goal for this specific initiative.
Metrics: To complete the initiative card and fill in the last section, refer back to your goal. You've already decided what you want to measure, like increasing quote requests (macro conversion).
For more detail, check out component-level metrics, such as the click-through rate (how many clicks compared to how many people saw it - micro conversion). Calculate the CTR by dividing the number of clicks on that component by the number of impressions it received.
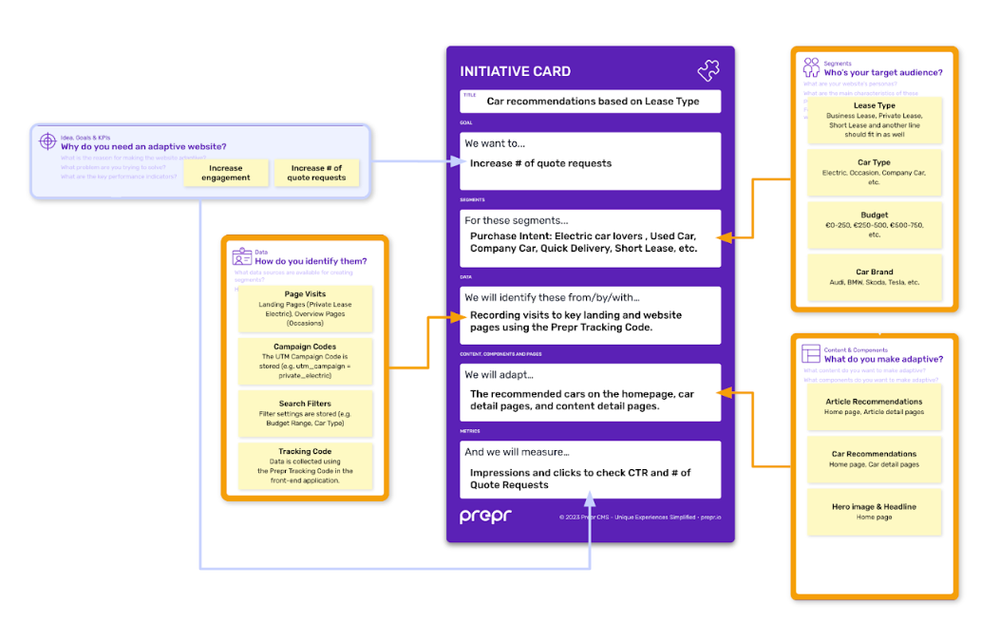
This structured approach ensures each initiative is well-defined and gives you a clear plan for reaching your bigger goals. Again, using our Acme Lease case as an example, let's check out a fully filled-out initiative card.
Prioritize your initiatives
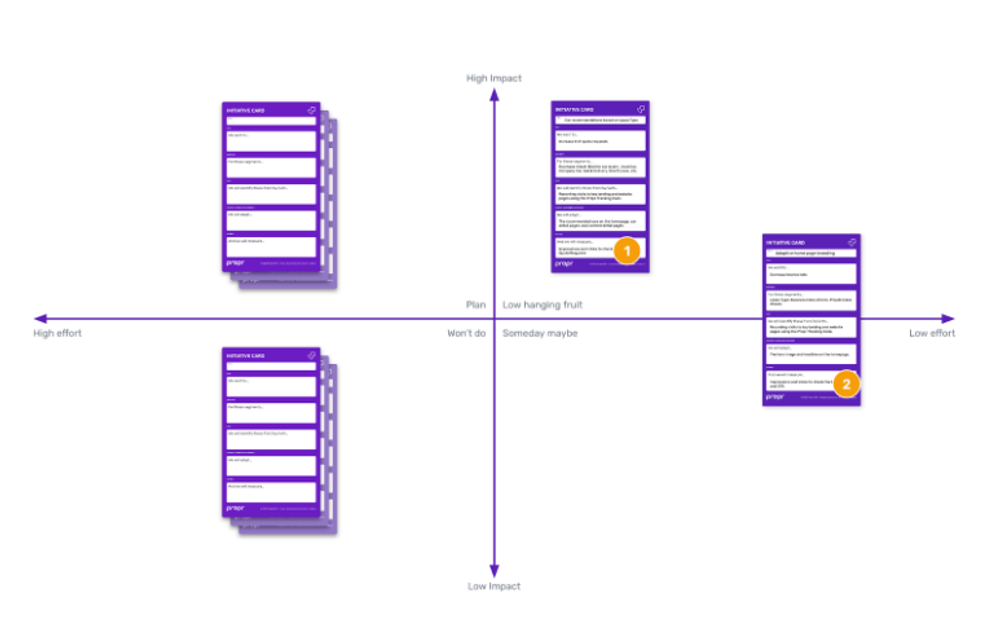
Now that you've identified multiple initiatives, the next step is to prioritize them and determine which one to tackle first. Picture it like a graph. You can use an impact-effort matrix, similar to the one depicted below, as a tool for this decision-making process.
When assessing an initiative, consider its potential impact on your business; so think about how much it'll boost engagement and conversion rates. On the other side, consider how much effort it takes to make it happen and keep it going. At this stage, you don’t need exact numbers; instead just use simple size estimates like small, medium, or large for now.
After estimating the impact and effort of each idea, plot them on the matrix with four quadrants, as illustrated in the image. Start with the easy wins, the "Low Hanging Fruit" - these are the ones that don't need much effort but can make a big impact. Once those are in motion, you can move on to the "Plan" and "Someday Maybe" quadrants.
Our recommendation is to keep the process simple initially. It's more about sorting out what can be done easily and making progress than getting everything perfect. This approach ensures a practical start to your strategy, allowing you to make tangible progress without getting bogged down in details.
Wow, can you believe it? Our Blueprint journey is finally wrapped up. It's taken three articles to go from a completely blank slate to where we are now, but hey, patience is a virtue, right? We chose to break down each section, explaining them thoroughly and ensuring each part got the attention it deserved.
Even though the Blueprint is finished, we still have two more articles left in our personalization series. So, as the sun sets on today's article, no worries, dear readers - Hakuna Matata! We'll circle back next week for another article. The next one will be a bit different, a sort of guide highlighting common mistakes to avoid. It's going to be a list of do's and don'ts that we're excited to share with you. Until then, enjoy the circle of life!
Getting started with Personalization
Now, are you ready to dive into Personalization? Starting your journey to personalize your website is easier than you think. If you're keen on the benefits of segment-based personalization, check out The Complete Guide to Getting Started with Personalization. You will learn how to create a personalized website with adaptive content that meets your visitors’ needs while boosting conversion by 30% or more.